Happy Birthday!1
June 2, 2011 by MartinB. | 10:10 am
Aron Till Wittich, Dan Cruz, Greg Hermann, Göran Wisniewski, Jan Frisse & Marcel Meyer!
-o-
Making Of – Plexiglass Fingerboard3
June 1, 2011 by MartinB. | 7:12 am
First of all, BIG THX! to Marcus Sudjojo for sending me his making of!
! PRECAUTION DISCLAIMER: You will be using power tools that are both risky and very dangerous. So remember, safety first. I will not be responsible for any accident and/or losses that may occur. Not recommended for those of you who have no experience operating power tools. !
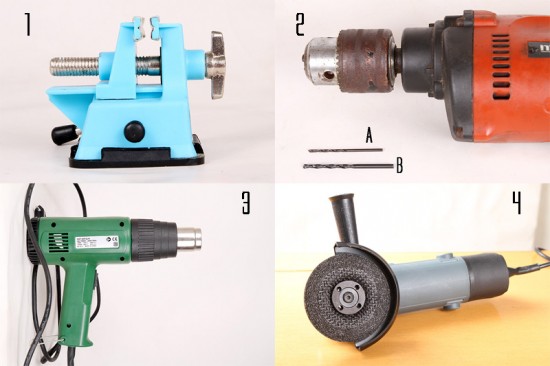
1. Clamp. Because this project is small in size, you can use small or portable clamp. A clamp that can be mounted vertically is better.
2. Electric drill. Impact drill is better. A table/perpendicular drill is the best, but I don’t have it. Also you’ll need 2 drill bits, A) 2mm and B ) 3mm
3. Hot gun, the kind used for drying and striping paint on the wall. Perhaps (I’m not sure) you can use a hair dryer instead (a hot gun with much less power/heat), but the working time would be doubled or even tripled
4. Angle grinder. I should have used a jig saw or coping saw, but I don’t have those, so I used the angle grinder as a subtitute.
5. Hand dremmel or block sander (optional)
6. Safety equipments (not shown in the picture). These include safety glasses, thick working gloves, respirator mask, and an ear muff
Things you’ll need:
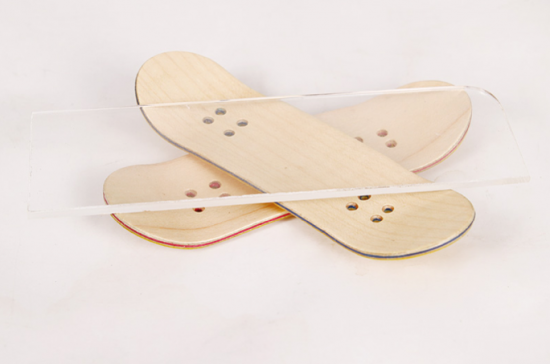
1. A small piece of plexiglass. I used 2mm thick. Perhaps 3mm would do, but IMHO above 3mm is too thick. I won’t write about how to cut plexiglass into a small piece as that would be a tutorial all by itself. You can google it, or find videos on youtube on how to cut plexiglass.
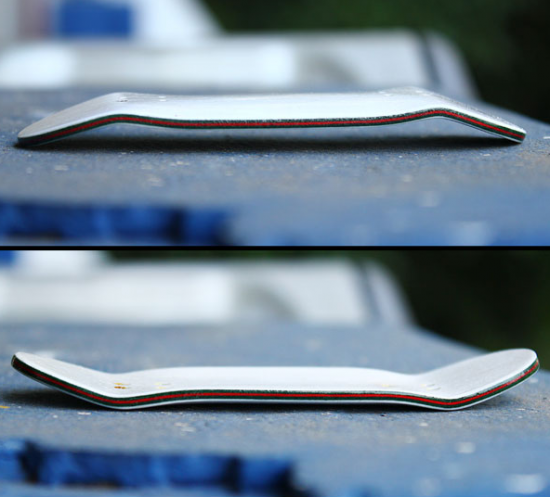
2. 2 wooden decks as mold. The deck must be identical in shape and size (i.e. same brand/manufacturer). If you do this project right, the decks won’t be ruin, and you can still make a complete fingerboard out of them. If you already have a real fingerboard deck mold, even better
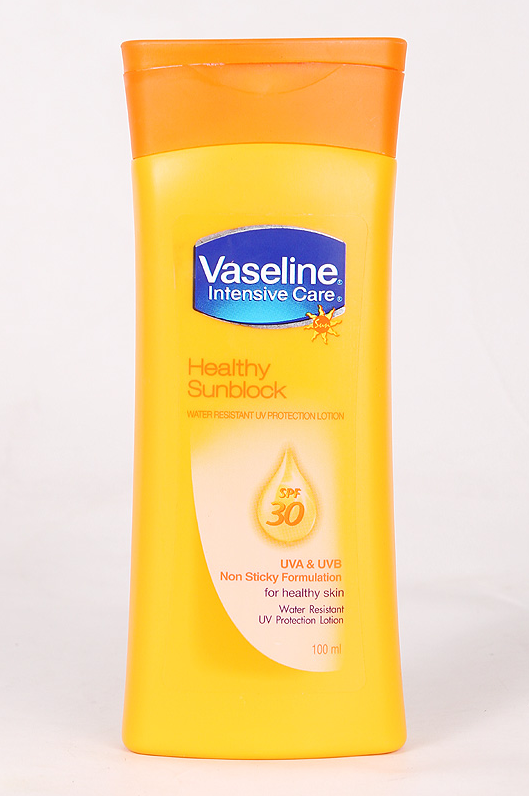
Hand lotion. Yup, you read me right Any hand lotion would be fine. I used vaseline sunblock as it was already lying around. I didn’t have hand lotion at that moment.
Not shown in the picture:
1. Permanent marker, the one you can write on plexiglass
2. Paper towel/toilet paper
3. Double tape. You’ll only need a small amount
4. Scissors
5. Some liquid soap (optional)
Ok, let’s get started.
I highly recommend doing this project outdoor (like in the garage or something), where it’s quiet and easy to clean afterward (believe me, this WILL get messy)
Gear up! Wear your safety gear properly, safety first!!
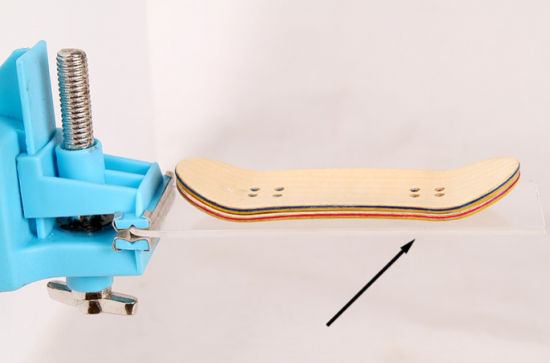
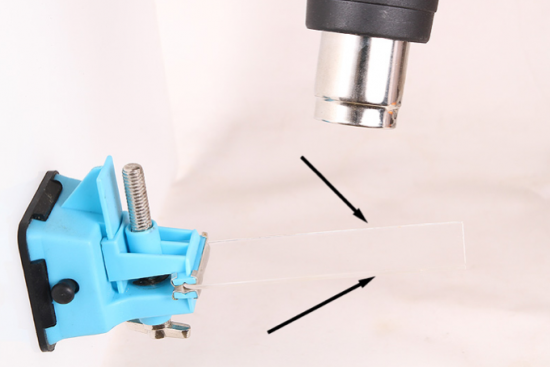
Mount your clamp vertically (if possible), and clamp one end of the plexiglass. I’ve put the deck on top of the plexiglass to show it’s there (the plexiglass is a little hard to see against white background)
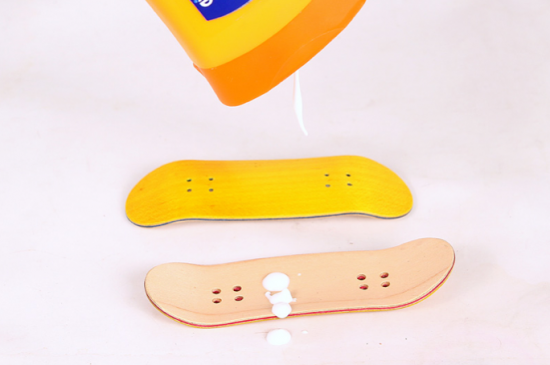
Pour 1 drop of vaseline on the decks. One drop on top and one drop on the bottom (on the other deck). In the picture I poured too much. You can wipe the excess with paper towel. Spread it evenly with your finger across the deck. The vaseline serve 2 purposes:
1. It prevent the plexiglass to stick to the decks
2. It make your decks smells really nice
Heat it with hot gun on high setting. Heat it from above, and occasionally from below. Try to keep the heat even on the plexiglass. Heat it until it start to bend like clay. Do not touch it while it’s still hot, you’ll ruin the surface of the plexiglass.
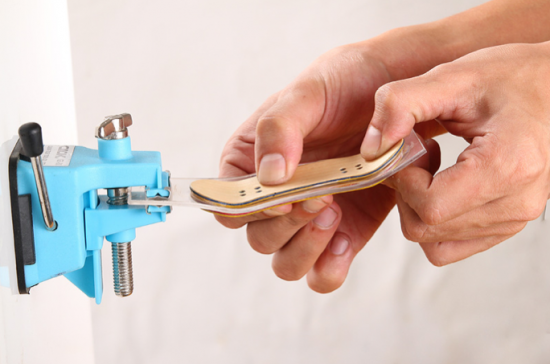
While the plexiglass is still hot and soft, quickly ‘clamp’ it with the decks. The one you poured vaseline on top goes to the bottom, and the one you poured vaseline on bottom goes on top (sorry if it’s a little confusing. Just look at the colors of the deck to understand what I meant)
‘Clamp’ it very tightly, especially on the kicks and the concaves, to make the plexiglass’ shaped right. Also the decks would be slippery (because of the vaseline), so keep that in mind. It will take a minute or two for the plexiglass to cool down and harden. You can help by blowing the plexiglass with your mouth.
Again, wear gloves, as this is very hot. For this picture, the plexiglass has already cooled down, so I can hold them with my bare hands, to pose for the picture.
Check the shape of the plexiglass. If it’s satisfactory, you can move on to the next step. If it’s not, repeat the step with the hot gun. Bear in mind though, you can only repeat this step 2-3 times, as the plexiglass will be weaken by heating-cooling-heating-cooling

Here you can see the plexiglass’ shaped accordingly to the deck’s shape
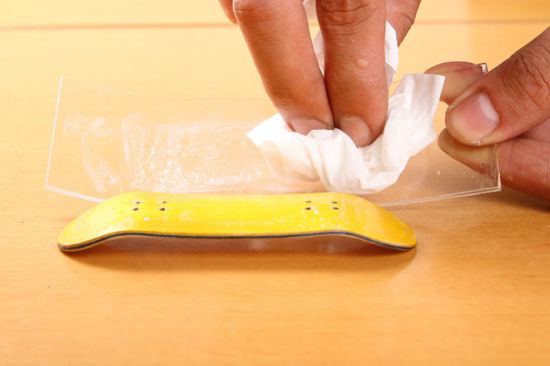
Wipe off the vaseline from the plexiglass and the top deck (where you put vaseline on the bottom). This is very important!! Don’t leave any vaseline on them. Use liquid soap if you have to. The two surface shouldn’t be slippery AT ALL!!
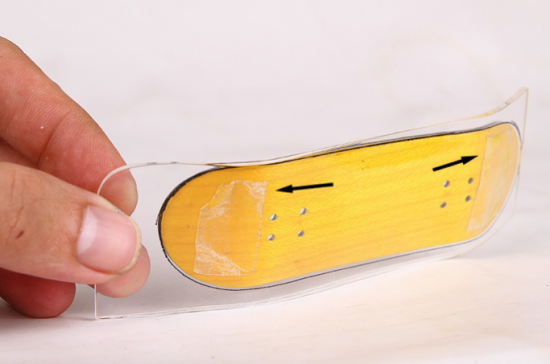
Using double tape, tape the top deck to the top of the plexiglass. This shouldn’t be hard to align, as the plexiglass already has the identical shape as the deck. Make sure it’s tight and not slippery at all or you’ll mess up the next steps.
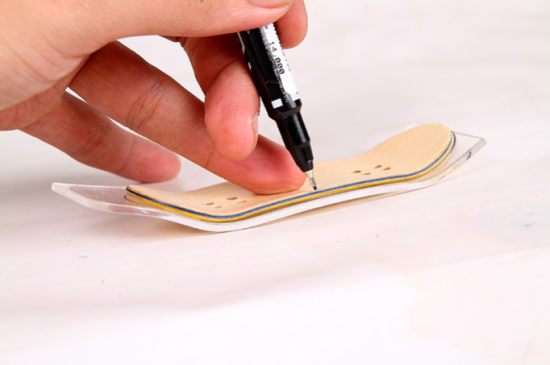
Use the permanent marker to draw the outline of the deck on the plexiglass. If there are vaseline left even just a little, the marker won’t write at all.
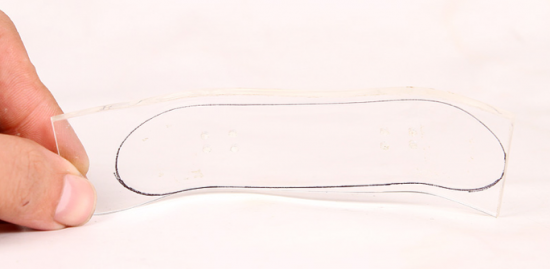
This is what it should look like on the plexiglass without the deck. But don’t take off the deck just yet. I just shot this picture to show you the outline of the deck.
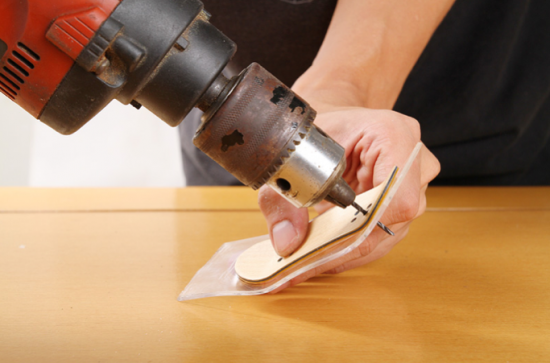
Put on the 2mm drill bit, and drill the holes for the screw. Use the holes on the deck as guide. Drill it as perpendicular as possible. This is why the deck and the plexiglass isn’t slippery at all. If there are vaseline left, the deck would be slippery, and the when you drill the hole, it would not align properly (I’ve thrown away a few piece of plexi because of this )
! Important note on drilling plexiglass: make sure the drill rotates at high speed before drilling. DO NOT put the drill on the plexi first, and start the drill later, as the plexi will chip and you’d have a ruined piece of plexiglass !
Drill all the 8 holes through.
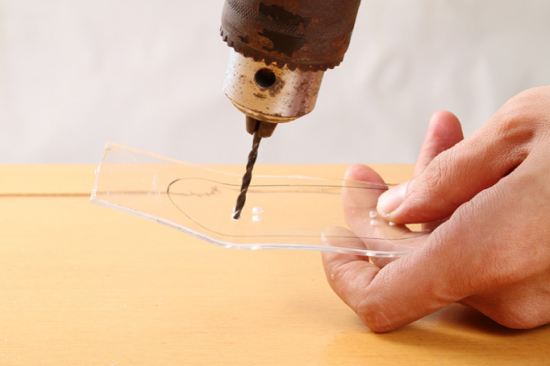
Now take off the deck, and clean the remaining double tape (if any). Put on the 3 mm drill bit. Drill it on the existing holes ONLY HALF WAY THROUGH!! DO NOT drill it all way through!! Notice in the picture, that’s as far as the drill bit should go.
Repeat for all 8 holes.
Now is a good chance to take a break, as the next step would be a little exhausting and require much concentration
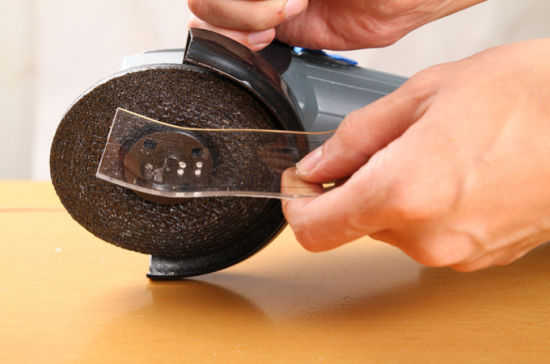
Put on your safety gear, including the respiratory mask. Take the angle grinder and grind away all the excess plexi (all segments outside the outlined part). This will get messy!! Any of you who have worked or seen a lumber cutting process should know what I mean The excess plexi would be grinded into A LOT of plexi powder. Be carefull, the plexi has a tendency to slip off your hand. Be sure the direction of the rotation of the angle grinder is AWAY from you, not TOWARDS you.
Grind away as close as possible to the outline, but still able to see the outline, keeping a smooth straight edge.
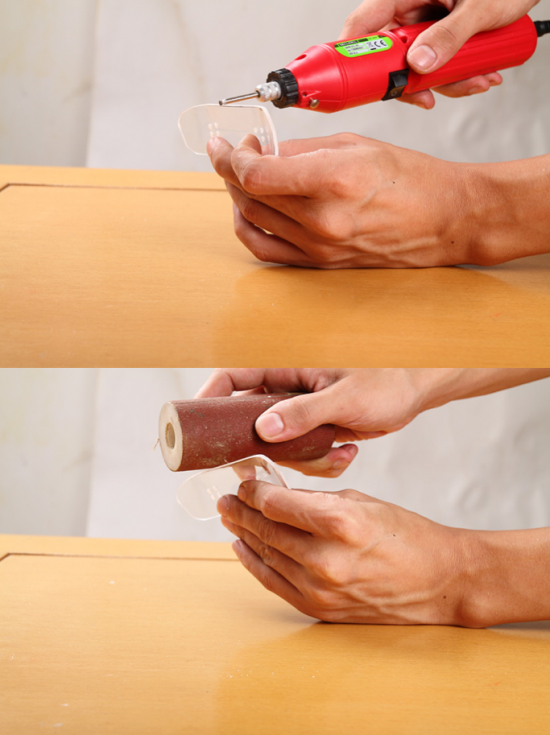
Smooth away the jagged edges with a hand dremmel or a block sander. If you use a hand dremmel, usually it comes with a rounded edge bit. You can use this bit to make the edge of the plexy rounded (just like a regular fingerboard deck). Smooth it until the outline marker is gone.
And you’re done, all that’s left is to put on trucks and wheels. Give yourself a pat in the back, and don’t forget to clean up the mess…
Here are some more pictures of the deck:
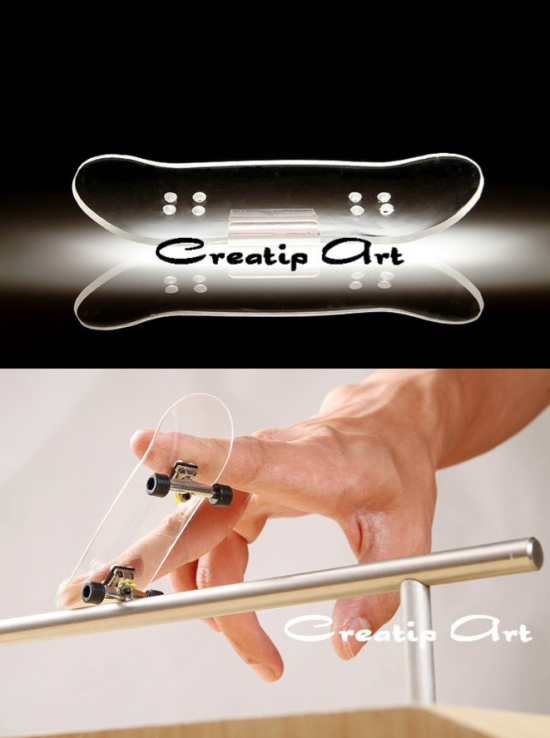
– Marcus Sudjojo”
AGAIN, massiv THX to Marcus Sudjojo for sending me this making of his plexiglass deck for fingerboardTV. I really appreciate it!






.png)


